

Hang a canvas so its center sits 57–60 inches from the floor, and match your hardware to the canvas weight and wall type. That single rule covers roughly 90% of what goes wrong when people hang art. The rest is just math and the right anchor.
Quick reference before you start:
- Default centerline: hang canvas so its center is about eye level
- Above furniture: keep a moderate gap between the furniture top and the canvas bottom for visual connection
-
Hardware by weight: under 5 lbs, a single nail works; 5–20 lbs, use a drywall anchor or hit a stud; or mount directly into a stud
- Renter-friendly: Command Canvas hangers are a solid damage-free option when you can’t put holes in the wall
Gallery standard: The 57–60 inch centerline matches average US eye level and is the same rule used in professional galleries. When hanging above a sofa, console, or bed, the 6–12 inch gap keeps the piece visually connected to the furniture rather than floating on the wall.
Table of Contents
- What tools and supplies do you need before you start?
- How do you hang a small or light canvas?
- How do you hang a large or heavy canvas safely?
- How do you hang an unframed or gallery-wrap canvas?
- Where should you hang a canvas for the best visual result?
- Which hangers work for different wall types and weights?
- What pro tips save time and prevent the most common mistakes?
- Where should you avoid hanging canvases?
- How do you fix a crooked, sagging, or slipping canvas?
- Why do the 57–60 inch rule and weight thresholds actually exist?
- Key Takeaways
- The one check professionals never skip
- Divineprints canvases arrive ready to hang
- Useful sources
What tools and supplies do you need before you start?
Getting the tools together first saves two trips back to the garage. Here’s what the job actually requires.
Tools:
- Tape measure
- Bubble level or digital level
- Stud finder
- Pencil
- Hammer or drill/driver
- Painter’s tape
- Kraft paper or newspaper (for templates)
Hardware options and when to use them:
- Sawtooth hanger: factory-installed on most small canvases; works for pieces under 5 lbs on a single nail
- D-rings + picture wire: versatile for medium canvases; wire lets you fine-tune left/right position after hanging
- J-hooks / OOK hooks: low-profile and rated up to 30–50 lbs depending on the model; good for drywall
- French cleat: the strongest option for large or heavy pieces; distributes load across a wide section of wall
- Command Canvas hangers: damage-free for renters; require a clean, dry surface and a cure time before loading
Most canvases from suppliers arrive with a sawtooth hanger already attached to the stretcher bar. Check the back before you buy anything.
Hardware quick-reference by weight:
| Canvas weight | Recommended hardware | Notes |
|---|---|---|
| Under 5 lbs | Single nail or sawtooth hook | Standard drywall; no anchor needed |
| 5–20 lbs | Plastic drywall anchor or stud | Anchor rated to weight; or find a stud |
| Over 20 lbs | Toggle bolt or direct stud mount | Two hooks recommended for stability |
| Any weight, no holes | Command Canvas hangers | Follow package weight limits exactly |
How do you hang a small or light canvas?
For anything under 5 lbs, a single nail or picture hook is all you need. The real work is the math that tells you exactly where to put it.
The measurement formula:
- Measure the canvas height (let’s say 16 inches).
- Divide by 2 to get the half-height (8 inches).
- Add half-height to your centerline: 58 + 8 = 66 inches from the floor to the top of the canvas.
- Measure from the top of the canvas down to the highest point of the hanger hardware when taut. That’s your hanger drop.
- Subtract the hanger drop from 66 inches. That’s where your nail goes.
Step-by-step:
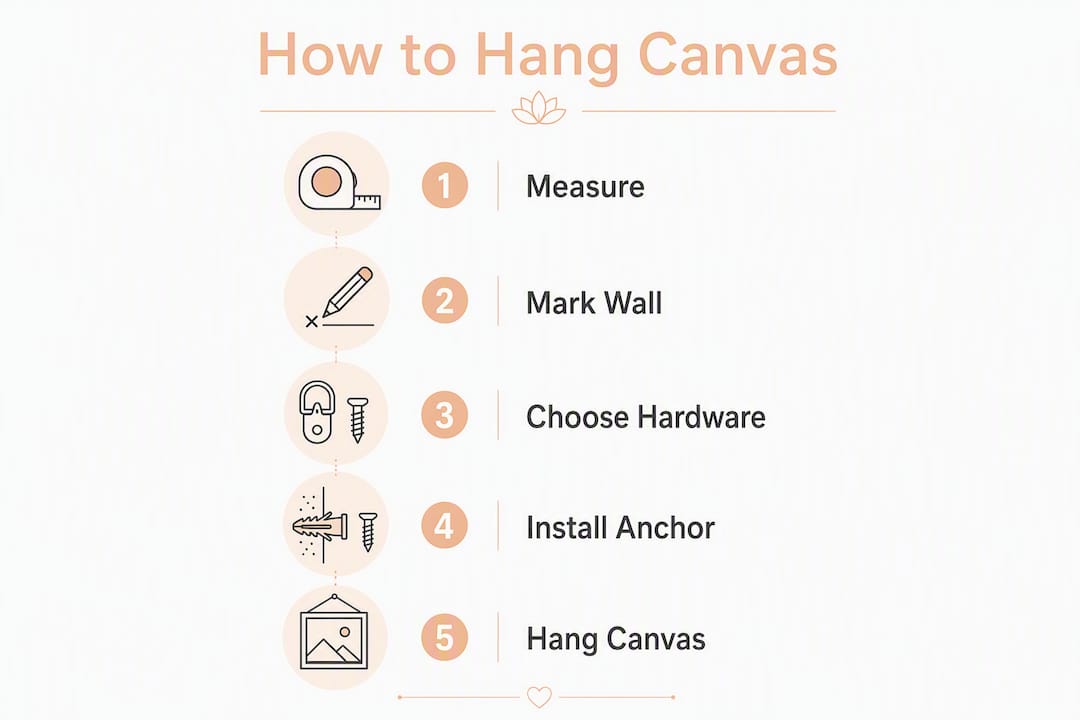
- Measure and record canvas height.
- Calculate the nail location using the formula above.
- Mark the wall lightly with a pencil.
- Drive the nail at a slight downward angle (about 45°).
- Hang the canvas and check level.
- Add felt bumpers to the bottom corners to prevent rocking.
The step sequence sounds obvious, but skipping the hanger-drop calculation is the single most common reason a nail ends up an inch too high.
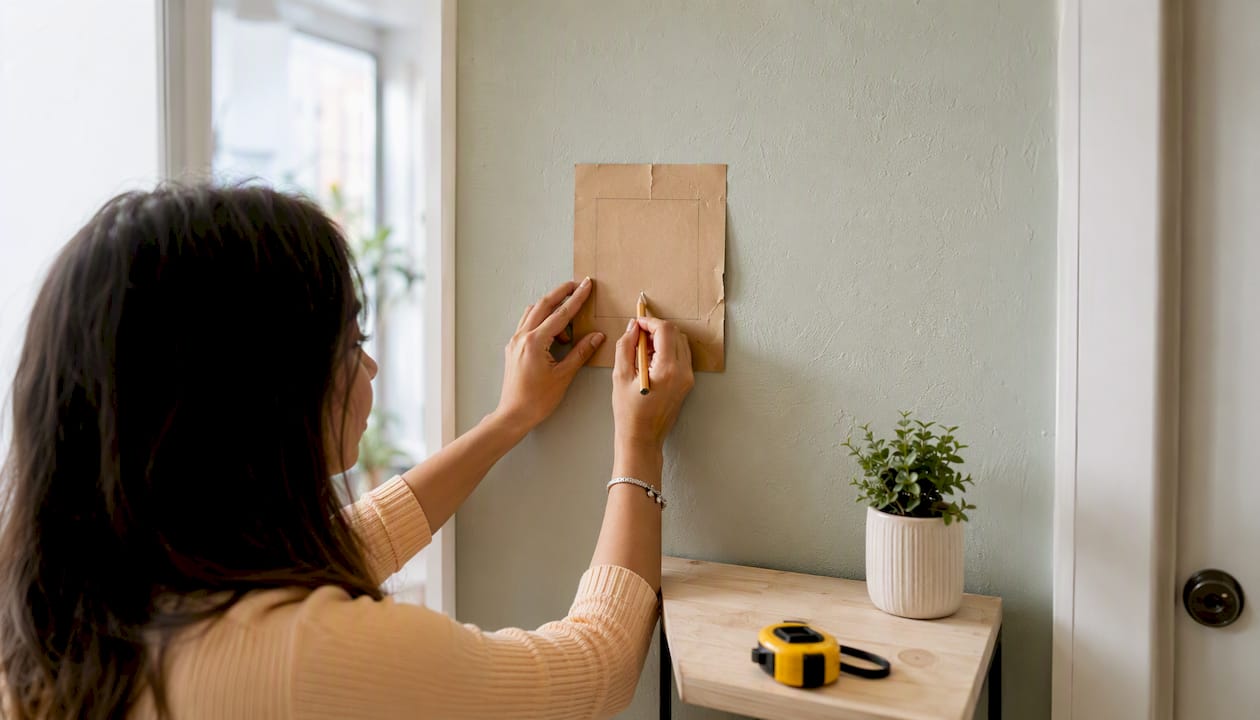
Pro Tip: Trace the canvas outline on kraft paper, cut it out, and tape it to the wall with painter’s tape before you drive a single nail. Mark the hanger location on the template. Step back, live with the placement for a few minutes, and adjust. Zero holes, zero regret.
How do you hang a large or heavy canvas safely?
Canvases in the 5–20 lb range need a drywall anchor or a stud. Anything over 20 lbs calls for toggle bolts or direct stud mounting. A single hook on a heavy piece isn’t just a hanging problem — it’s a falling problem.
Two-hook method for large canvases:
- Use two hooks spaced apart rather than one centered hook. This spreads the load and prevents the piece from tilting over time.
- Space the hooks roughly one-third of the canvas width in from each side.
- Use a long spirit level laid across both hooks before you hang anything.
- For wire-hung canvases, mark both hook locations by pulling the wire taut and measuring where it peaks.
Installation steps:
- Calculate the centerline and hanger drop as above.
- Mark both hook locations at the same height using a level.
- Install anchors or drive screws into studs.
- Hang the canvas, check level, and let it settle for two minutes.
- Check level again — hardware shifts slightly under load.
Safety note: Always check the anchor packaging for its rated load. A plastic expansion anchor rated at 25 lbs in drywall is not the same as one rated at 50 lbs. When in doubt, go heavier or find a stud.
Weight-to-hardware reference for large pieces:
| Weight | Wall type | Hardware | Installation note |
|---|---|---|---|
| 5–20 lbs | Drywall | Plastic anchor + screw | Drill pilot hole; anchor must be flush |
| 5–20 lbs | Stud | Wood screw (2 in+) | No anchor needed |
| 20–50 lbs | Drywall | Toggle bolt | Requires larger hole; very strong hold |
| 20–50 lbs | Stud | Lag screw | Most secure option available |
| Over 50 lbs | Any | French cleat + studs | Distribute load across multiple studs |
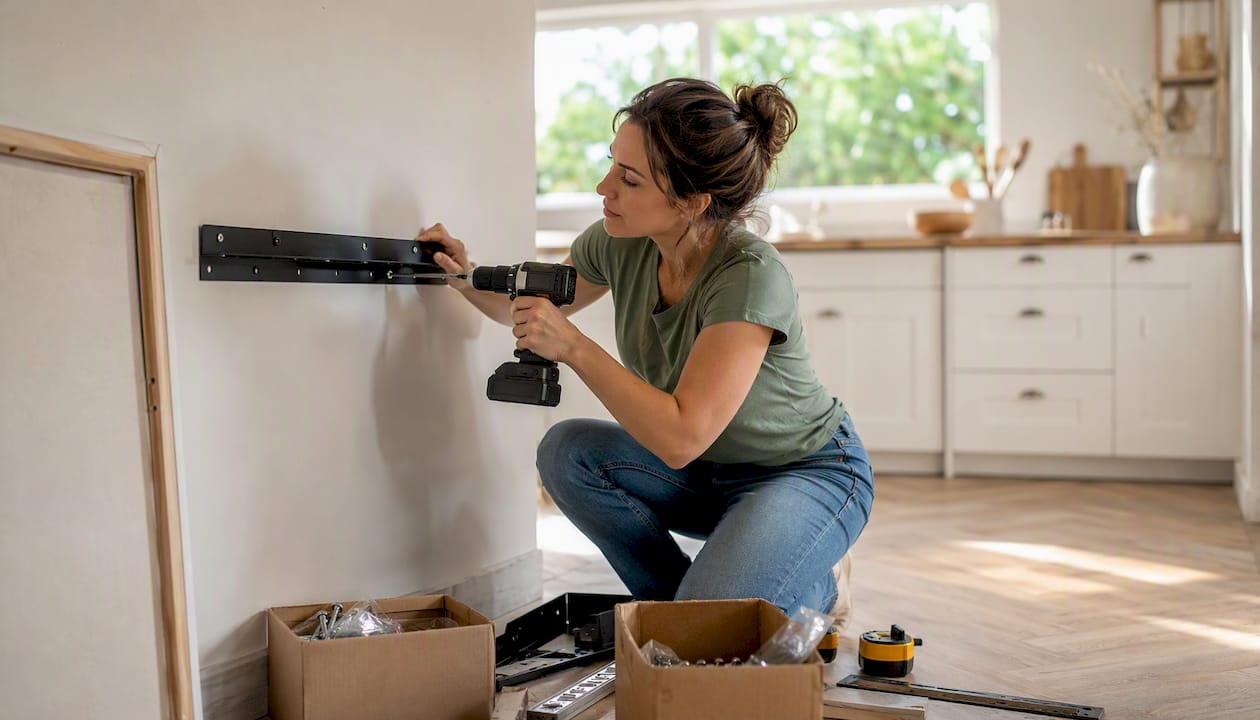
For large Christian wall art pieces, the two-hook method with a French cleat is the most reliable long-term solution, especially for pieces displayed in high-traffic rooms.
How do you hang an unframed or gallery-wrap canvas?
Gallery-wrap canvases — where the image wraps around the stretcher bars with no frame — are the most common format for printed canvas art. The hardware goes on the stretcher bars themselves, not a frame.
Hardware by canvas size:
- Small gallery-wrap (under 5 lbs): sawtooth hanger centered on the top stretcher bar
- Medium gallery-wrap (5–20 lbs): two D-rings screwed into the side stretcher bars, connected by picture wire
- Large gallery-wrap (over 20 lbs): offset clips or a French cleat mounted to the back of the stretcher frame
Attaching hardware to stretcher bars:
- Place D-ring screws at least 1/3 of the way down from the top of the side bars to avoid splitting the wood near the corner joints.
- Use screws no longer than the bar is thick — typically 3/4 inch to 1 inch for standard stretcher bars.
- For sawtooth hangers, center them on the top bar and use both screws, not just one.
- Offset clips grip the top stretcher bar from behind and sit flush against the wall, which keeps the canvas tight to the surface.
Pro Tip: Stick small adhesive felt pads on the two bottom corners of the stretcher bar before hanging. They protect the wall from scuffs and stop the canvas from swinging when someone walks past. A $3 pack of felt dots solves a surprisingly persistent problem.
For modern gallery-wrap formats, offset clips are worth the extra step — they keep the piece sitting flat against the wall rather than angled forward at the bottom.
Where should you hang a canvas for the best visual result?
The 57–60 inch centerline rule exists because it matches average US standing eye level. Galleries use it universally. The most common mistake in home hanging is going too high — usually because people eyeball the center of the wall rather than the center of their field of vision.
The math for any placement:
- Centerline (58 in) + half the canvas height = top of canvas from floor
- Top of canvas minus hanger drop = nail location
- This measurement-first method removes guesswork entirely
Above furniture:
Keep 6–12 inches between the top of a sofa, bed headboard, or console table and the bottom edge of the canvas. Less than 6 inches looks cramped. More than 12 inches and the piece floats, disconnected from the furniture below it.
Grouping multiple canvases:
- Treat the entire arrangement as one unit. Find the center of that unit and align it to the 58-inch centerline.
- Keep gaps between panels consistent for a cohesive gallery look; adjust spacing depending on room size and style preference.
- The total width of a grouping should be roughly 2/3 to 3/4 the width of the furniture beneath it.
- For faith-centered home décor, a triptych arrangement works well above a prayer table or altar — treat the three panels as one unit and center the group.
Placement standard: Gallery-standard hanging centers artwork at 57–60 inches from the floor. When hanging above furniture, the gap between the furniture top and canvas bottom should be 6–12 inches.
Which hangers work for different wall types and weights?
Wall material changes everything. A toggle bolt that holds 50 lbs in drywall is useless in a plaster wall if you don’t account for the brittleness. Here’s how to match hardware to what’s actually behind the paint.
By wall type:
- Standard drywall: plastic expansion anchors for 5–20 lbs; toggle bolts for heavier pieces; screws into studs for anything over 20 lbs
- Plaster walls: use painter’s tape over the drill spot to prevent chipping, drill a pilot hole, then use a plaster-rated anchor
- Brick or concrete: masonry drill bit required; use masonry plugs or mortar-joint clips (which avoid drilling the brick itself)
- Wood studs: drive a 2-inch wood screw directly — no anchor needed, and the hold is stronger than any drywall anchor
| Wall type | Weight range | Hardware | Key installation note |
|---|---|---|---|
| Drywall | Under 5 lbs | Nail or picture hook | No anchor needed |
| Drywall | 5–20 lbs | Plastic expansion anchor | Drill pilot hole to match anchor diameter |
| Drywall | Over 20 lbs | Toggle bolt | Requires 1/2 in hole; very secure |
| Plaster | Any | Plaster-rated anchor | Tape drill spot; pilot hole first |
| Brick/concrete | Any | Masonry plug | Masonry bit required |
| Wood stud | Any | Wood screw (2 in+) | Most secure; use stud finder first |
Safety note: Plaster is brittle and can crack in a wide radius if you drill without a pilot hole. Always tape the spot first and go slow. For memorial or devotional canvases displayed in older homes with plaster walls, this step prevents irreversible damage to both the wall and the piece.
Stud finder tip: Run the stud finder slowly and mark both edges of the stud, not just the first beep. The center of the stud is between those two marks — that’s where your screw goes for maximum grip.
When displaying framed Christian wall art on plaster walls, the plaster-anchor method is the right call. Framed pieces are heavier than bare canvases, and the added weight makes the pilot-hole step non-negotiable.
What pro tips save time and prevent the most common mistakes?
The installers who hang art for a living do three things every amateur skips: they calculate hanger drop before touching the wall, they use a paper template, and they check level twice.
Pro habits worth adopting:
- Make a kraft-paper template of the canvas, mark the hanger location on it, and tape it to the wall before drilling. Adjust freely — no holes yet.
- Use a bubble level after hanging, then wait two minutes and check again. Hardware settles under load and the canvas often shifts slightly.
- For pieces over 5 lbs, use two hooks. A single hook on a medium canvas will tilt over time as the wire stretches.
- Add felt bumpers to the bottom two corners of every canvas. They protect the wall and stop the piece from swinging.
- Clean the wall surface with isopropyl alcohol before applying Command strips or any adhesive hanger. Dust and paint residue cut adhesion dramatically.
Common mistakes to avoid:
- Hanging too high (eyeballing the wall center instead of measuring 58 inches from the floor)
- Using a nail where an anchor is needed (the nail pulls out gradually under load)
- Skipping the level check entirely
- Overloading Command strips beyond their rated weight
Pro Tip: After hanging, step back and close one eye. A canvas that looks level from directly in front can still be visibly off from across the room. Check from your natural viewing distance, not from two feet away.
Where should you avoid hanging canvases?
Canvas prints are more sensitive to environment than most people realize. The stretcher bars are wood, and wood moves with moisture. The canvas itself fades under UV exposure.
Avoid these locations:
- Bathrooms and laundry rooms — steam and humidity warp stretcher bars over time
- Walls that receive direct sunlight for several hours a day — UV fades pigment, especially in inkjet-printed canvases
- Exterior-facing walls in climates with large temperature swings — the wall itself conducts cold and heat, creating condensation behind the canvas
- Near HVAC vents — forced air dries the canvas unevenly and accelerates cracking in the gesso layer
Preservation practices:
- Keep the room at stable humidity, ideally 40–55% relative humidity
- If a canvas must go in a bright room, apply a UV-protective varnish or use UV-filtering glass in a frame
- Humidity and direct sunlight are the two primary causes of warping and fading in canvas prints
- For sentimental or memorial pieces — including devotional canvases displayed in family spaces — the same preservation principles apply; a resource like Memory Keep’s bereavement guidance touches on protecting meaningful keepsakes in home environments
Museum-grade canvas prints use archival inks and UV-resistant coatings that extend lifespan significantly. Even so, placement in a stable environment is the single most effective preservation step.
How do you fix a crooked, sagging, or slipping canvas?
Most hanging problems fall into three categories: hardware failure, measurement error, or wall give. Each has a targeted fix.
Diagnose first:
- Canvas tilts to one side: uneven hook heights or wire not centered on the hanger
- Canvas sags or pulls away from wall: anchor is failing or overloaded
- Canvas slips or creeps downward: Command strips have lost adhesion, or the hanger is worn smooth
Fixes by problem:
- Tilting: re-measure hook heights with a level; adjust wire length or hook position
- Sagging anchor: remove canvas, fill the hole, let dry, and reinstall with a heavier-rated anchor or find the stud
- Slipping Command strips: remove, clean the wall with isopropyl alcohol, apply new strips, and allow full cure time before reloading
- Single hook tilting over time: add a second hook and redistribute the wire
- Canvas rocking at bottom: add adhesive felt bumpers to the bottom corners
Safety note: If an anchor has visibly pulled away from the wall or the drywall around it is crumbling, remove the canvas immediately. Reinstall with toggle bolts or find a stud. A partially failed anchor is not a “good enough for now” situation — it will fail completely, usually when no one is watching.
The two-hook method solves most tilt and sag problems before they start. If you’re troubleshooting a recurring tilt on a medium or large canvas, switching from one hook to two is almost always the permanent fix.
Why do the 57–60 inch rule and weight thresholds actually exist?
The 57–60 inch centerline isn’t arbitrary. It corresponds to average US standing eye level, which means the visual center of the artwork lands where your eyes naturally rest when you walk into a room. Galleries adopted this standard because it creates a consistent viewing experience across pieces of different sizes — the art changes, the eye level doesn’t.
The weight thresholds come from hardware load ratings and the physics of drywall. Standard 1/2-inch drywall has a shear strength that limits how much a nail or small anchor can hold before the fastener pulls through. Plastic expansion anchors work by spreading that load across a wider area of drywall. Toggle bolts go further, gripping the back face of the drywall entirely, which is why their load ratings are so much higher.
When to adjust the 58-inch default:
- Ceilings above 9 feet: raise the centerline to 60–62 inches so the art doesn’t look low in the room
- Very low furniture (a floor cushion or low platform bed): drop the centerline to 52–54 inches so the piece stays visually connected
- Gallery sequences along a staircase: follow the stair angle and keep the centerline consistent relative to each step, not the floor
- Children’s rooms: lower the centerline to 48–52 inches so the art is at the child’s eye level
The measurement-first approach — calculate hanger drop, mark the wall, then drill — applies in every case. The only variable is the centerline height you start with.
The standard: The 57–60 inch centerline equals average US eye level and creates consistent viewing. Weight thresholds (under 5 lbs: nail; 5–20 lbs: anchor; over 20 lbs: toggle or stud) come from hardware load ratings and drywall shear limits.
Key Takeaways
Hang a canvas correctly by centering it at 58 inches from the floor, calculating the hanger drop before drilling, and matching your anchor to both the canvas weight and the wall material.
| Point | Details |
|---|---|
| Default centerline | Set canvas center at 58 inches from the floor; adjust to 57–60 inches for ceiling height or furniture. |
| Hardware by weight | Under 5 lbs: nail; 5–20 lbs: drywall anchor or stud; over 20 lbs: toggle bolt or direct stud mount. |
| Measure hanger drop | Subtract the hanger drop from the top-of-canvas height to find the exact nail location before drilling. |
| Protect the canvas | Avoid humidity, direct sunlight, and HVAC vents to prevent warping and fading over time. |
| Divineprints ready-to-hang | Divineprints canvases arrive with preinstalled hardware, making the measurement-first method straightforward from the first hang. |
The one check professionals never skip
The paper template habit is the single biggest separator between a professional install and an amateur one. Not because it’s complicated, but because it costs nothing and eliminates the most expensive mistake in hanging: a hole in the wrong place.
Every time I see someone skip the template step, they end up with at least one extra hole to spackle. The template takes four minutes. Spackling, drying, repainting, and rehinging takes an afternoon.
The second habit worth stealing from professional installers is the double level check. Hang the piece, check level immediately, then walk away for two minutes. Come back and check again. Hardware settles under load, wire stretches, and the canvas shifts. That second check catches the drift before it becomes permanent.
For devotional canvases — the kind of faith-based wall art that goes above a prayer space or in a bedroom — the preservation piece matters as much as the hanging itself. A beautifully hung canvas in a humid bathroom or a sun-blasted window wall will look worse in two years than a piece hung imperfectly in a stable, shaded room. Get the placement right first, then get the hardware right.
Divineprints canvases arrive ready to hang
If you’d rather skip the hardware sourcing entirely, Divineprints Christian canvas wall art ships with preinstalled hanging hardware, felt corner pads, and gallery-wrap construction — so the measurement-first method described in this guide works from the moment the box arrives.

The Sacred Heart of Jesus canvas and the Transfiguration of Jesus canvas are two of the most popular ready-to-hang pieces, available in multiple sizes with weight and hardware details listed on each product page. For anyone building a devotional display or looking for a Confirmation or baptism gift, the saints collection covers a wide range of sizes and subjects. Check the product page for the specific weight and hanger type before you gather your tools — it saves the extra trip.
Useful sources
These are the primary references used throughout this guide, organized by topic.
- Command™ Canvas Picture Hangers | 3M Command — Official product page for Command Canvas hangers; cited for renter-friendly, damage-free hanging and adhesive cure requirements.
- How to Hang Canvas Wall Art | Wall Canvas Art — Source for the measurement-first method (hanger drop calculation), cited in the small-canvas and expert-explainer sections.
-
— Visual reference for the weight-to-hardware thresholds (nail / anchor / toggle), cited in the hardware and BLUF sections.
- How to Hang Canvas Art | Wayfair — Step-sequencing reference for installation procedures, cited in the small and large canvas sections.
- How to hang a picture with two hooks | Picture Hang Solutions — Source for two-hook stability guidance and spirit-level verification, cited in large canvas and troubleshooting sections.
- How to hang pictures on plaster walls | AShanging — Plaster-specific installation guidance (tape, pilot hole, plaster-rated anchor), cited in the wall-types section.
- 5 practices to avoid when hanging art | Park West Gallery — Environmental preservation guidance (humidity, sunlight), cited in the preservation section.
- How to use a level | Apartment Therapy — Source for the double level-check habit, cited in the pro tips section.
- How to make a gallery wall | Style by Emily Henderson — Source for the paper template technique, cited in the small canvas and pro tips sections.