

Hang it so the visual center sits 57–60 inches from the floor, and leave 6–10 inches between the top of the furniture and the bottom of the frame. Those three numbers handle most situations in any room.
Quick-start checklist:
- Measure your furniture width (sofa, bed, console) or the open wall width between architectural anchors.
- Multiply by 0.67 (two-thirds) for a restrained look, or by 0.75 for a bolder anchor.
- Shop for that target width in framed outer dimensions, not print size alone.
Pro Tip: When you’re torn between two sizes, go larger. A piece that’s slightly too big reads intentional. One that’s slightly too small just looks forgotten.
Key Takeaways
| Point | Details |
|---|---|
| Furniture width rule | Art above furniture should span 60–75% of that furniture’s width. |
| Hanging height | Center the artwork 57–60 inches from the floor; drop to ~54 inches for dining rooms. |
| Furniture gap | Leave 6–10 inches between the furniture top and the bottom of the frame. |
| Shop framed dimensions | Add mat and frame thickness to print size before comparing to your target range. |
| Divineprints sizing | Divineprints offers devotional prints in multiple sizes and framing options matched to these calculated ranges. |
Table of Contents
- What are the right sizing rules for choosing art size?
- How do you measure your wall and furniture for the right fit?
- Common print sizes and the furniture widths they suit
- What size art works above a sofa, bed, fireplace, or blank wall?
- How high should you hang art, and how do you space multiple frames?
- What mistakes do people make when picking art size?
- Sizing devotional and faith-centered art for your home
- Divineprints makes it easy to order prints sized for your space
- Sources
What are the right sizing rules for choosing art size?
The two-thirds-to-three-quarters rule is the backbone of every good wall art decision. Above a sofa, bed, console, or fireplace mantel, art should span 60–75% of the furniture width.
A few supporting rules sharpen the formula:
- Err larger within the range. Most buyers choose art that’s too small; when you’re between sizes, the larger option reads as a deliberate design choice rather than an afterthought.
- Treat a grouping as one shape. A pair or triptych counts as a single visual unit. Measure the outer edges of the group and apply the percent rule to that total; keep 2–3 inches of consistent spacing between frames.
- Gallery standard vs. home standard. Professional galleries center art at 57 inches from the floor. At home, that rule bends when furniture spacing takes over, but it’s still the right starting point for any standalone piece.
- Taller ceilings call for bigger art. In rooms with ceilings above the standard 8 feet, scale up your target size by roughly 10–20% to keep the piece from looking dwarfed.
Pro Tip: Portrait orientation suits narrow walls and tall spaces; landscape works better above wide furniture like a king bed or a long sectional. When the wall and the furniture pull in different directions, let the furniture win.
How do you measure your wall and furniture for the right fit?
Measurement takes about five minutes and saves you from buying the wrong size twice.
- Measure the furniture width. For a sofa, include the arms. For a bed, measure the full frame or headboard width. For a console or credenza, measure edge to edge.
- Measure the available wall width. Run the tape from one architectural anchor to the other: a corner, a window casing, a doorframe, or the edge of an adjacent piece of furniture.
- Decide: above furniture or standalone? Above furniture, your target width comes from the furniture measurement. On an open wall, it comes from the wall measurement.
- Do the math. Multiply your measurement by 0.67 and 0.75 to get your target range.
Example: An 84-inch sofa gives you a target art width of 56–63 inches. A 36x48 print in a 2-inch frame becomes a 40x52 framed piece. That fits the lower end of the range. A 40x60 framed piece (44x64 with frame) hits the upper end and anchors the sofa more boldly.
That last point matters more than most people realize. Framed outer dimensions are what determine perceived scale on the wall, not the print size printed on the product listing. Always add mat width and frame thickness to the print dimensions before comparing to your target range.
Mockup method: Cut kraft paper to your target framed dimensions, tape it to the wall, and step back to the spot where you’d normally sit or stand. Take a photo on your phone. The camera flattens perspective the same way a finished hang does, so scale problems that your eye misses become obvious in the image.
Common print sizes and the furniture widths they suit
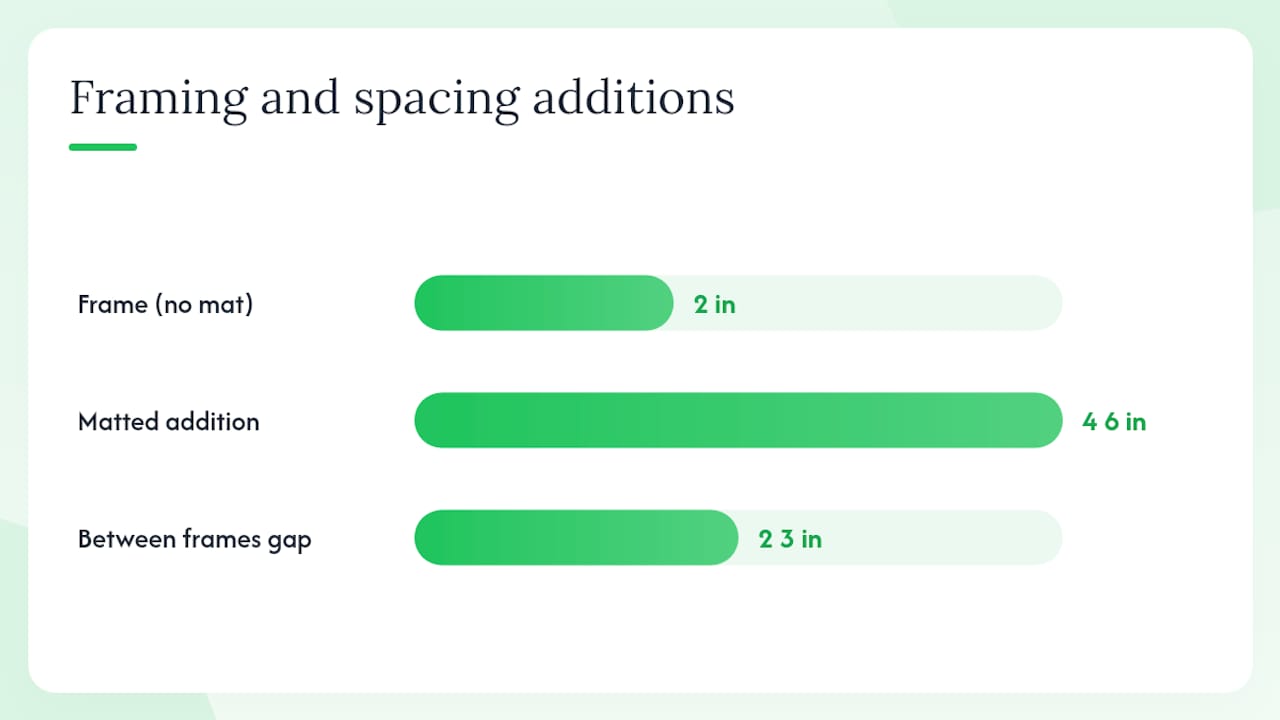
Frame estimates assume a 2-inch frame with no mat. Add 4–6 inches total for a matted piece.
A few orientation notes worth keeping in mind:
- 1:1 (square) prints work well above consoles and in symmetrical gallery grids.
- 2:3 (portrait) prints suit entryways, narrow hallways, and devotional niches.
- 1:2 (landscape) prints anchor wide sofas and king beds most naturally.
For gallery walls, measure the outer edges of the whole arrangement and apply the 60–75% rule to that combined footprint, then keep 2–3 inches between each frame inside the group.
What size art works above a sofa, bed, fireplace, or blank wall?
Above a sofa
For a 60-inch loveseat, that means a framed width of 40–45 inches. For a standard 84-inch sofa, aim for 56–63 inches. A 96-inch sectional can carry a grouped arrangement with a combined width of 58–72 inches.
Above a bed
The gap between the top of the headboard and the bottom of the frame is typically 3–10 inches, depending on headboard height. A queen bed (60 inches wide) suits a framed piece of 36–48 inches. A king (76 inches) works well with 48–60 inches, or a diptych arrangement at that combined width.
Above a fireplace mantel
A 60-inch mantel calls for a framed width of 40–45 inches. Taller fireplace surrounds can carry taller portrait pieces without the room feeling top-heavy.
Blank walls, hallways, and entryways
For a single piece on an open wall, fill roughly 60–75% of the wall width. Portrait orientation suits narrow hallways; for wide walls above 72 inches, a diptych or triptych arrangement often reads better than a single oversized canvas.
Staircases
Treat a staircase gallery as one vertical composition. Step the visual centers of each piece to follow the stair angle, keeping them roughly parallel to the slope of the handrail. Consistent spacing (3–4 inches) between frames matters more than matching sizes.
How high should you hang art, and how do you space multiple frames?
Galleries hang the visual center of artwork at about 57 inches from the floor. At home, that number holds for any standalone piece. Above furniture, the furniture-gap rule takes over: position the bottom of the frame 6–10 inches above the furniture top, which typically places the visual center somewhere between 57 and 65 inches depending on the piece’s height.
To find the hook location:
- Mark the wall at your target visual center height (57 inches for standalone; furniture top + 8 inches + half the frame height for above-furniture pieces).
- Measure from the top of the frame to the hanging hardware when the wire is taut.
- Subtract that distance from your center mark. That’s where the hook goes.
For dining rooms, drop the center slightly to around 54 inches because most viewers are seated. For gallery walls, maintain 2–3 inches of consistent spacing between frames; exact symmetry matters less than consistent gaps throughout the grid.
- Use kraft-paper templates before drilling. Tape them up, step back, and photograph the layout.
- Check the view from your usual seating position, not just standing in the doorway.
- For art behind a desk or workspace, check how it reads on a video call: frame the camera and see what’s visible.
Pro Tip: Eye level varies by household. If you have young children or frequently host seated gatherings, drop your hanging height by 2–3 inches from the standard 57-inch center. The art will feel more connected to the people in the room.
What mistakes do people make when picking art size?
The single most common error is buying too small. A piece that looks substantial in a product photo can disappear on a real wall. Here’s what else goes wrong:
- Hanging too high. Art drifts upward when people aren’t anchoring it to furniture. The 57-inch visual-center rule exists for this reason.
- Centering on the wall instead of the furniture. A sofa pushed against one side of a room should have art centered over the sofa, not the wall behind it.
- Ignoring framed dimensions. Ordering a 24×36 print and expecting it to fill a 30-inch space doesn’t account for the mat and frame that add 4–8 inches to each dimension.
- Skipping the mockup. Kraft paper costs nothing. A return shipment costs time and money.
- Misreading sightlines. Art placed for a standing viewer can feel disconnected in a room where everyone sits.
Pro Tip: Take a photo from across the room with your phone, then crop the image to simulate a smaller or larger piece. It’s the fastest way to test scale without buying anything.
Sizing devotional and faith-centered art for your home
Devotional art carries a different kind of weight than decorative pieces, and that changes how you size and place it.
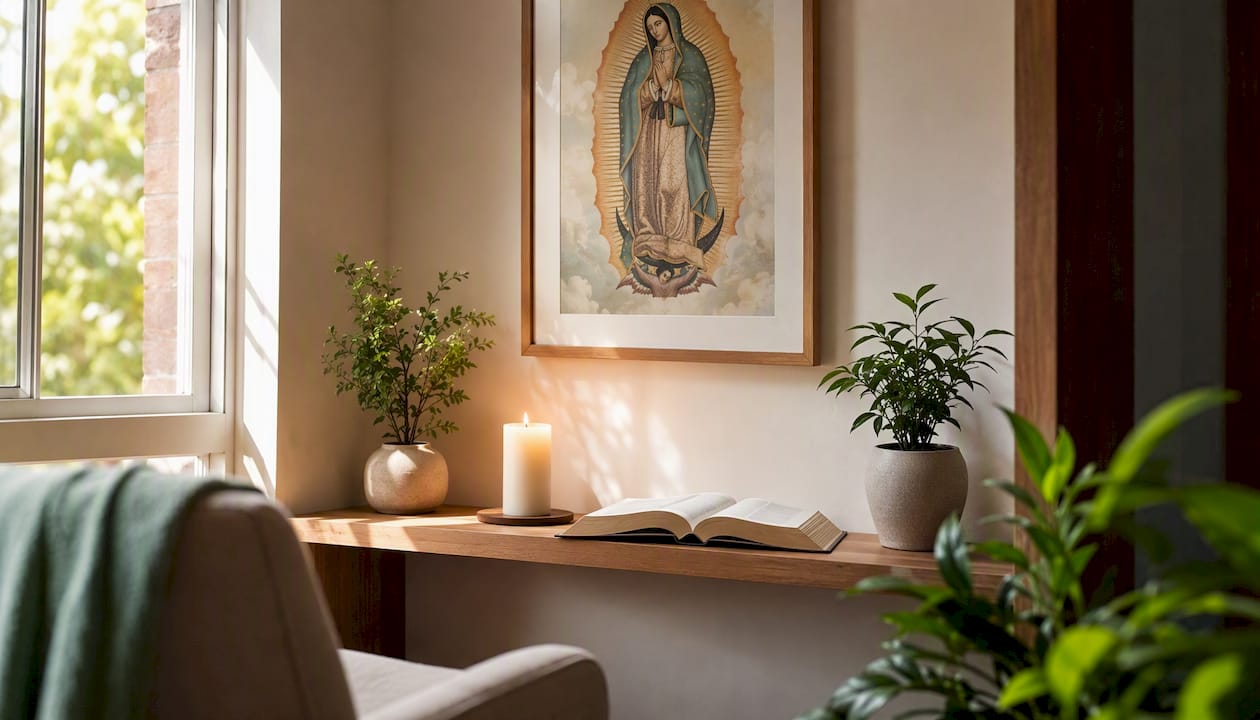
When a print of a saint, the Sacred Heart, or a biblical scene serves as a focal point in a prayer corner or entryway, a slightly larger scale is appropriate. Faces and focal iconographic elements should read clearly from the typical viewing position, whether that’s a seated prayer posture or a family gathered in the living room.
A few placement principles worth following:
- Anchor devotional art to furniture. Use a console, small table, or kneeler as the base reference and apply the 60–75% width rule to that piece, not the full wall.
- Reduce the vertical gap slightly. For altars and prayer corners, a gap of 4–8 inches between the furniture top and the frame bottom keeps the composition intimate rather than floating.
- Use wider mats for smaller prints. A 3–4 inch mat on a smaller devotional print adds breathing room and gives the image the dignity it deserves without requiring a larger canvas.
- Consider the frame as part of the visual weight. A simple dark wood or gilded frame reads differently than a thin metal one. The frame choice affects perceived scale as much as the print dimensions do.
For guidance on how composition and style affect devotional placement, the Divineprints blog covers how modern religious artists approach scale and focal balance in their work.
Pro Tip: For a prayer corner, arrange the devotional print first, then build the surrounding space around it. Reverse the usual process: let the art set the scale, and choose the furniture to match.
The practical case for trusting the measurements
The percent rules in this guide aren’t arbitrary. They reflect how the human eye reads proportion in a room: too small and the art looks accidental; too large and it crowds the space. The 57-inch hanging height comes from gallery practice refined over decades. These numbers work because rooms and furniture follow predictable proportions.
That said, small adjustments are always valid. Use the formulas to get to the right neighborhood, then let your eye and the mockup make the final call. Kraft paper is cheaper than a return label.
Divineprints makes it easy to order prints sized for your space
Once you have your target framed dimensions from the measurement steps above, Divineprints lets you order devotional and Christian wall art sized to fit. The catalog includes museum-grade fine art prints and canvases in multiple sizes, with framing options that let you match the outer dimensions to your calculated target range.
Whether you’re placing a Sacred Heart print above a console in your entryway or choosing a saint canvas for a prayer corner, the size selection covers the ranges this guide describes: from smaller devotional pieces suited to nightstands and narrow walls, up to large-format canvases that anchor a living room sofa. You can browse the full saint and devotional print collection to find the right image, then select the size that matches your measurements before ordering. Use the kraft-paper mockup step before you finalize, and you’ll know exactly what you’re getting before a single hole goes in the wall.